|
|
|
|
4 - SECOND
PAINT LAYER |
|
6 - FINISHING
TOUCHES |
|
| ———————————————————— |
|
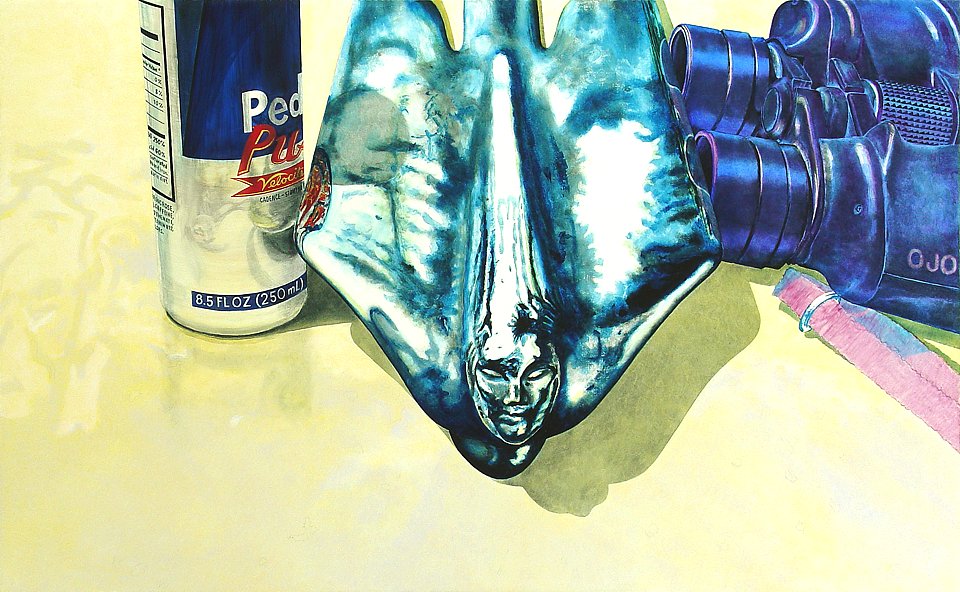
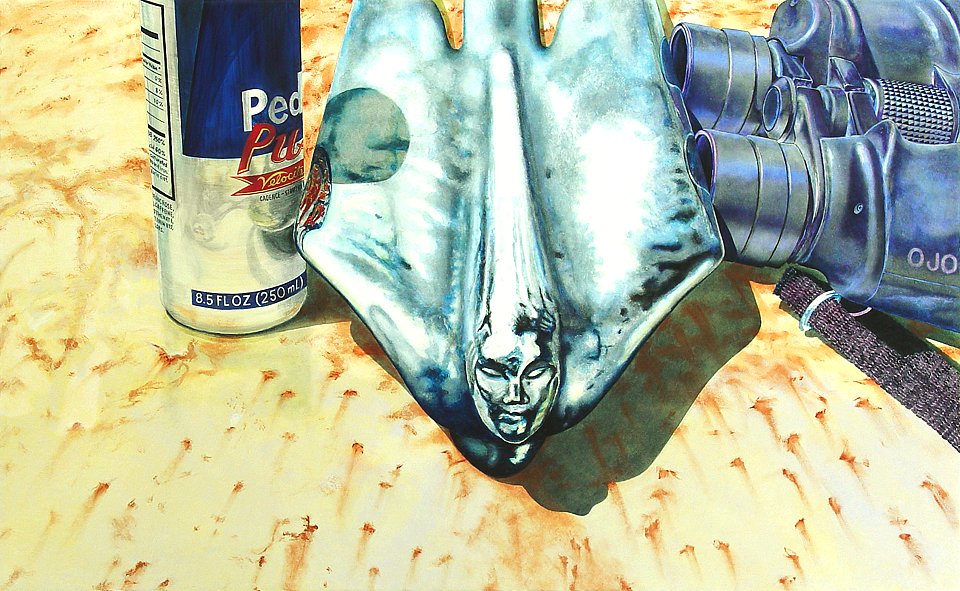
Layer Three continues the process of defining detail and strengthening contrasts. Payne's Gray is carefully worked onto the binocular eyepieces. They suddenly appear substantial and an effect appears simulating metallic finish. It's a bit much but it furnishes me with the ideal sub-structure for the final finish I have in mind. |
 |
|
Next, the dark form-defining Payne's Gray work is extended to the entire body of the binoculars. They really are beginning to take shape. |
|
|
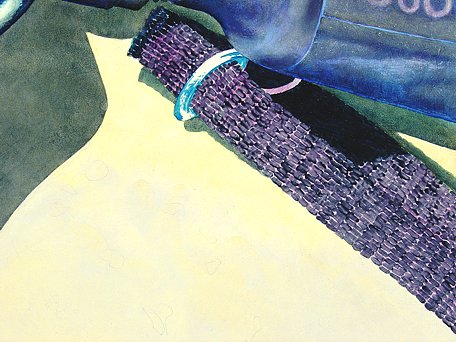
In the following images, you can witness Layer Three blurring into the finishing touches phase. As I mentioned earlier, after the first two very orderly layers, I now devote myself to whatever attracts my attention. Anything that seems less than finished catches my eye. The strap is treated to rhythmic strokes of Payne's Gray. They represent the woven strands of acrylic twine that give it strength. Even though the painting is much larger than life, there is no need to overkill with thread detail that would normally be subliminal, especially under such high-contrast conditions. I used the fingertip patting method to distribute another layer of Payne's over the prominent shadow areas under all the major elements. |
|
|
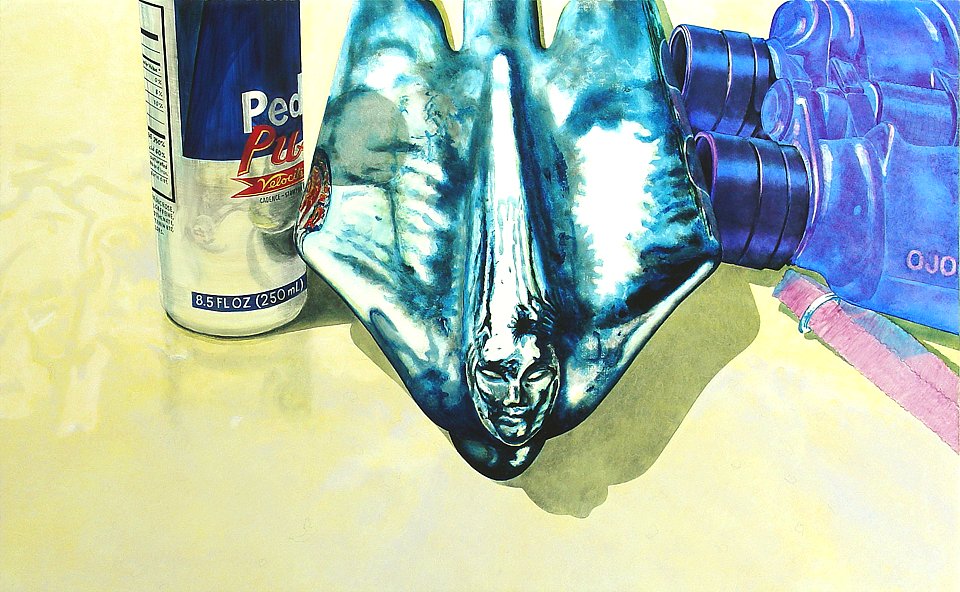
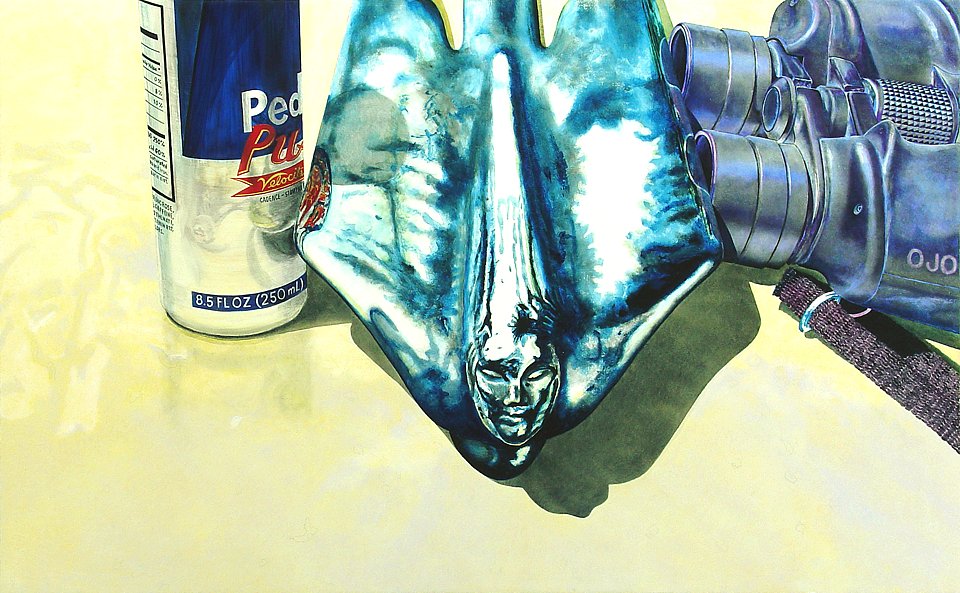
And then a couple days of personal distractions kept me out of the studio, time enough for the few painted portions of Layer Three to dry. There's no longer any need to keep mindful order with the evolution of future layers. Only so much more work will take place over the foundation layers of each major element. All that is required is to keep moving around the painting so as to give each section time enough to dry to tack before any further work takes place on or near it. I resumed work by thoroughly cleaning my palette and remixed batches of cool Titanium White and the warmer Flake White. I even added a barely perceptible Jaune cast to the Flake to warm it up a bit more. The Tit White is reserved for the surface of the mascot to soften the reflection edges by blending them into the large white expanses. I start by fingertipping the yellowish Flake White mixture onto the binoculars, where it will impart a chalky texture to more realistically symbolize the actual appearance of the rugged molded casing. It also further enhances the illusion of depth and form by adding yet another highlight texture. |
 |
|
And then I finally got 'round to painting a third layer on the background field color of the hood. All along it has been my intent to depict the hood and its mascot as weather-worn and pitted by rust. I tried a bit of Indian Red but it was too red, so I mixed up some Terra Rosa. In keeping with the practice of over-saturated undertones followed by subsequent toning-down measures topside, I set about adding the rust treatment to the hood. I used my frizziest old badger blender, the one with the most irregular, ragged hairs jutting out in broken, splintered shafts from the detached ferrule that I Scotch-taped to the brush handle. The basic elements of most rust corrosion stains would consist of a peeled-up curl of brittle finishing paint, a dark patch just inside the open wound, and an oxidation stain that somewhat surrounds the broken paint area and then runs downward off the hood; at least that's what real rain streaking causes. I cautiously smeared only the underside of the reddish-brown blotches to simulate the streaking while still preserving the jagged definition of the corroded pock mark. Later, I will have to soften the too-brilliant Terra Rosa and detail the broken paint areas. |
|
|
The mascot has to wait a bit longer for its own rusty pit specks until I finish applying that cool Titanium White coating I prepared earlier to brighten it and complete the illusion of highly reflective chrome. I carefully pat on the thin veneer of white, working and reworking various areas until the hood mascot appears luminescent. I've blended the white over the edges of the blue patches underneath so that no distinct line remains, softening harsh brushwork along the entire topside of the mascot. I paid extreme attention to blending the white overpainting in the more intricate face details and found myself working and reworking the face by alternately removing paint and then repainting in the various colors already applied in that area. |
| ———————————————————— |
| And now it's a sprint through the Finishing Touches. |
| ———————————————————— |
|
|
4 - SECOND
PAINT LAYER |
|
6 - FINISHING
TOUCHES |
|
———————— GALLERIES ————————


|